HUMAN RESOURCE
Designation
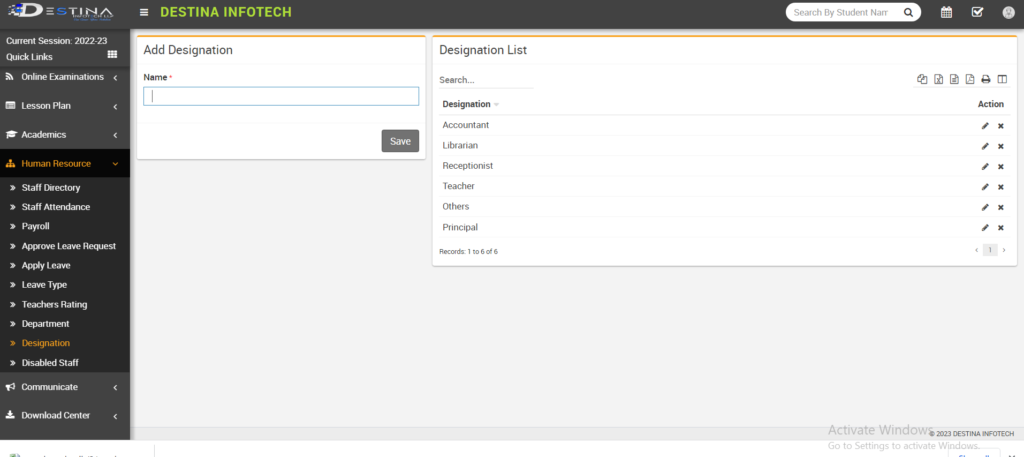
Designations such “Accountant,” “Teacher,” “Principal,” “Librarian,” “Receptionist,” and “Others” can be added. Afterward, click “Save” to keep the records.
Department
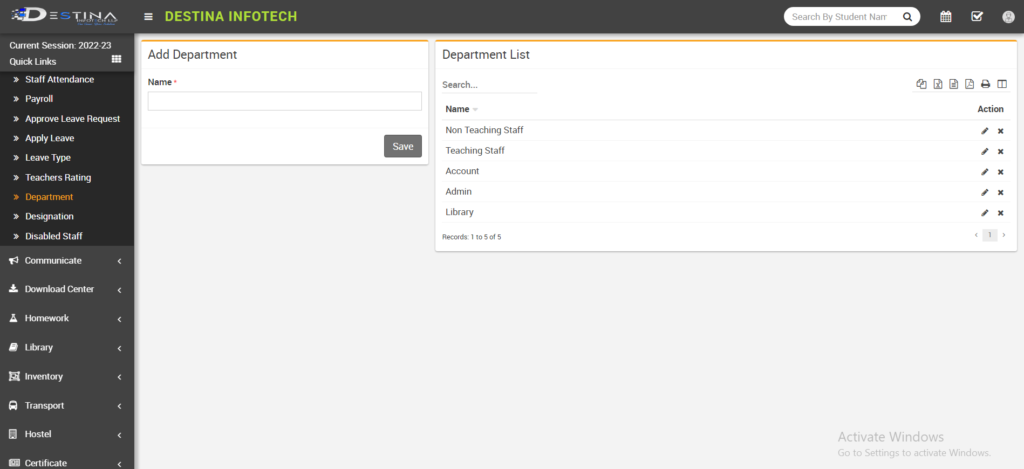
Similar to designation, add the departments you want, such as teaching staff, non-teaching staff, account, admin, etc., and then hit save.
Staff Directory

After selecting Staff Directory, you will be sent to a page showing the total number of employees. Click Add Staff if you want to add staff (marked). The following section will discuss how to add staff. Click on the three line mark on the staff details page if you wish to access the profile of an already-added employee. Click on edit to make changes if you wish to edit. Then select save. You can use a keyword search to look up certain employees (Staff ID, Role, Name etc.)
Add Staff
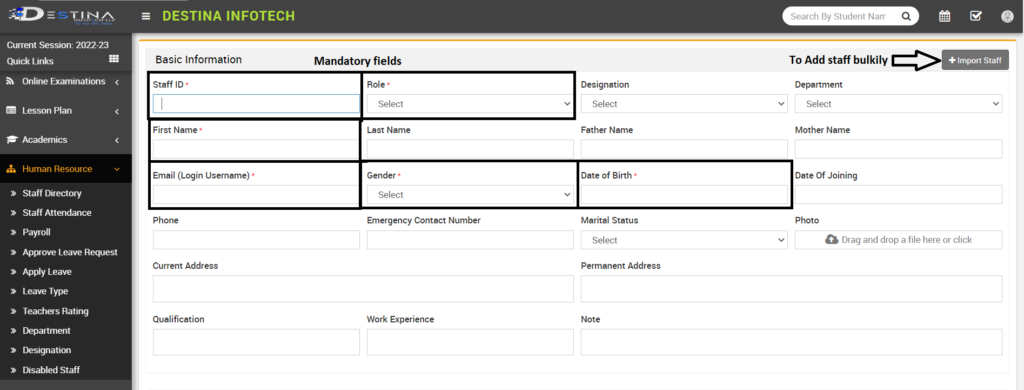
Add these staff members’ information once you’ve reached the Add Staff page to create a staff profile. The indicated columns are mandatory fields (marked). We cannot add employees without including this necessary information. Even the staff’s photos can be scanned and uploaded in the Picture field.
If you want to add every employee at once, produce an Excel sheet with every employee’s information whose profile has to be created, and email it to us. The sheet will be checked and modified according to our format.
The staff member’s username on their personal portal will be their email address (login name), therefore be sure to include an active email address.
Staff more details
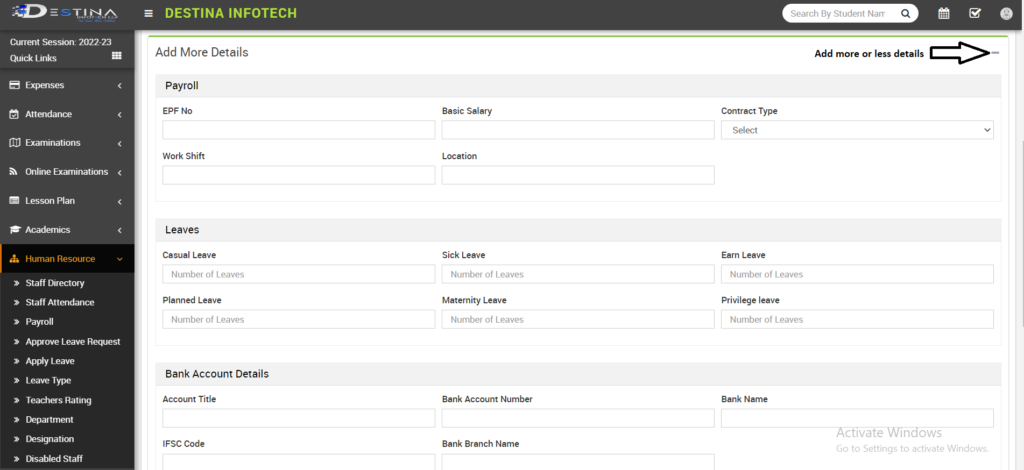
In addition to the mandatory information, click the Plus mark to enter other personal info. Once there, you must enter the staff salaries in Basic Salary so that it may be fetched automatically when creating Staff Payroll. Also, you can add bank information, the sort of leave they will be taking in accordance with the Institute’s leave policy, and scan and upload documents like a resume, an Aadhaar card, a letter of experience, etc. for admin use. Once you add staff, they will start receiving emails containing login information (username, password, and URL) from u800761312 (or a similar ID) to the provided mail ID. These login credentials can be used by staff to access their portal.
Staff Attendance
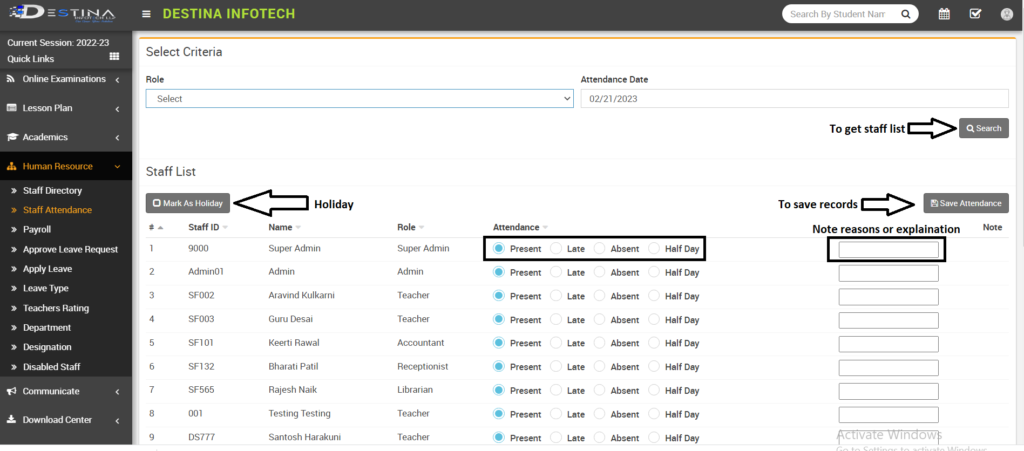
You must search this list by adding the Attendance Date. In a list, everyone is marked as present by default. You must mark any staff member who is absent as being left. You must note someone down if they are half a day late or absent. If there is a cause or if administration is told beforehand, write a note. Then, to store records, click on Save Attendance (highlighted). If the institution is closed, select Mark as Holiday (marked).
Leave Type
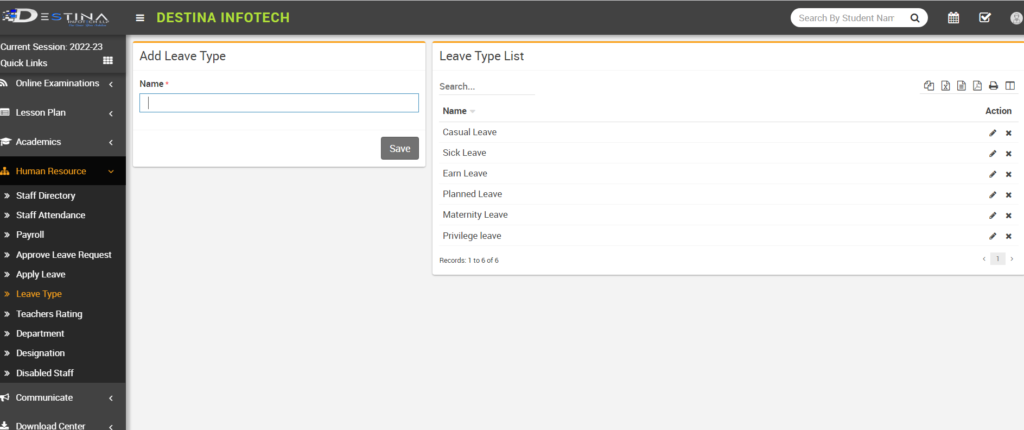
Include leave categories that follow institute leave policies. Add Leave (for example, Casual Leave, Earn Leave, Planned Leave, etc.) and save.
Approve Leave Request
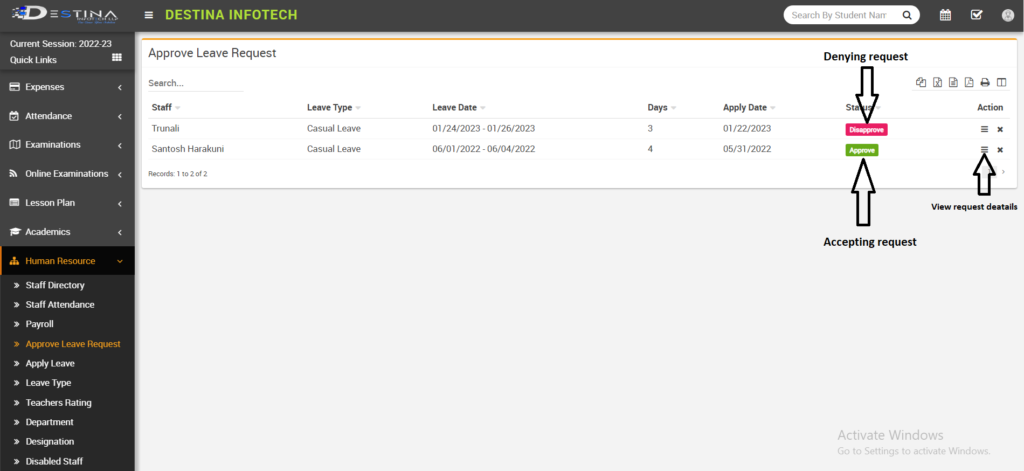
If any staff members submitted a request for leave, the page for admin approval requests will be redirected. There are options to approve or disapprove (marked). Admin may make judgements based on staff timeline. You will be taken to a new page that is described in the following section if you click on view request information.
View Leave request
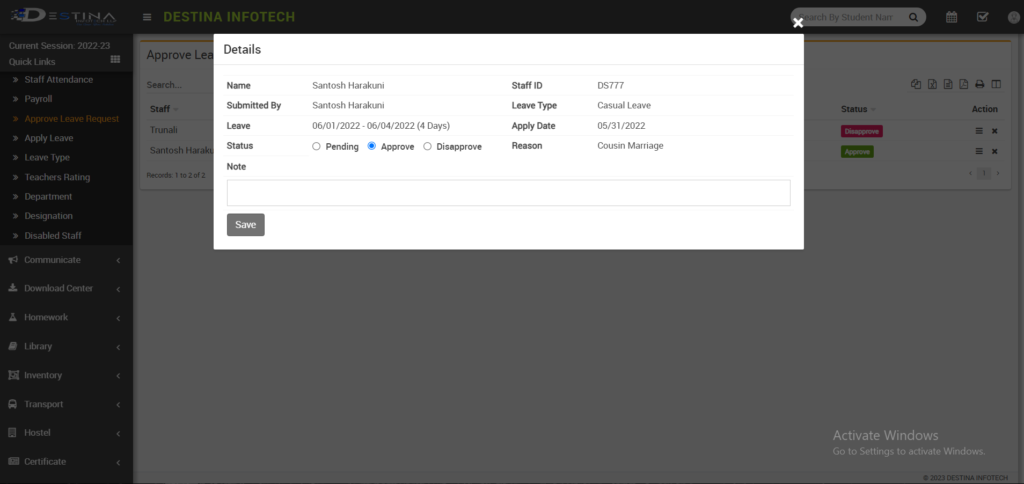
Your staff timeline will take you to this page after you click on view. Admin takes action after confirming the number of leaves, date, and reason of leaves. Click on approve if you want to approve, and utilize the note block if you want to make a note instead. Then select save. If you wish to express disapproval, do so while providing justification. They will receive informed of the appropriate response as soon as you take this step on the staff portal.
Payroll
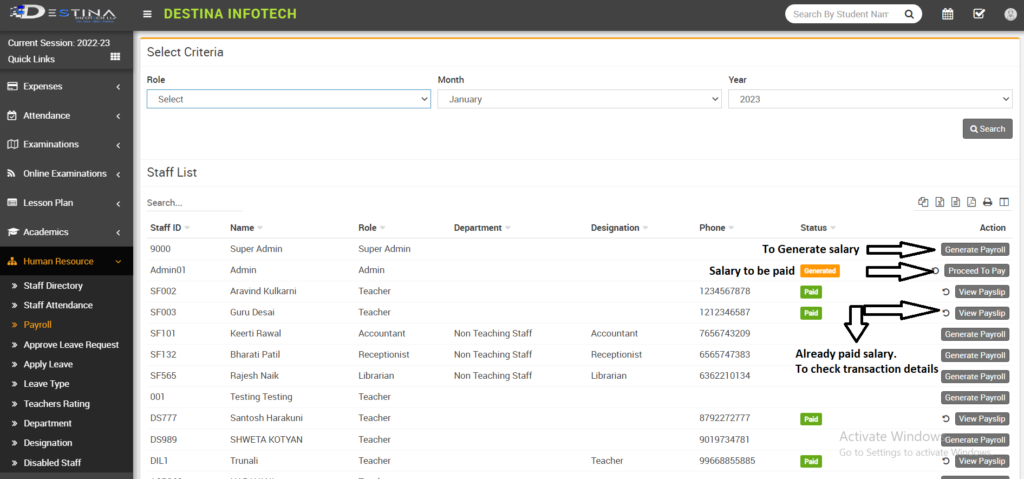
Admin can generate payroll after updating staff monthly attendance. Click on Create Payroll (marked); the next section will explain how to produce. If you have already generated, select Pay Now (marked) to complete the payment. If you have previously generated and paid, selecting See Payslip will allow you to examine every transaction, deduction, earning, and payment date information (marked).
Generate Payroll
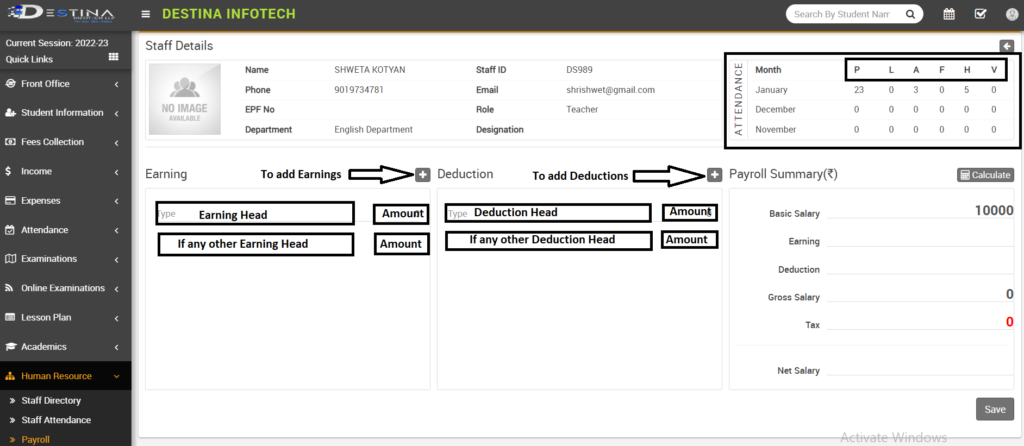
When you select Create Payroll, you will be directed to this page. If the staff’s monthly attendance is updated, the number of working days that are present (P), Late (L), absent (A), Half Day (F), Holiday (H), and Authorized Leave (V) will be automatically calculated (marked). If you added Staff Basic Pay while adding staff, it will immediately be fetched.
Click the plus sign (marked) next to deduction if you want to add any further deductions. And include any deductions (i.e. PF, ESI, if any unplanned leaves etc.)
Click the + sign (marked) next to Earning to add any earnings you wish to include (i.e. Bonus, Incentives etc.) Then, if you wish to include tax, do so and press compute to produce the net salary that will be paid. Save generated salary as well.
ACADEMICS
Sections
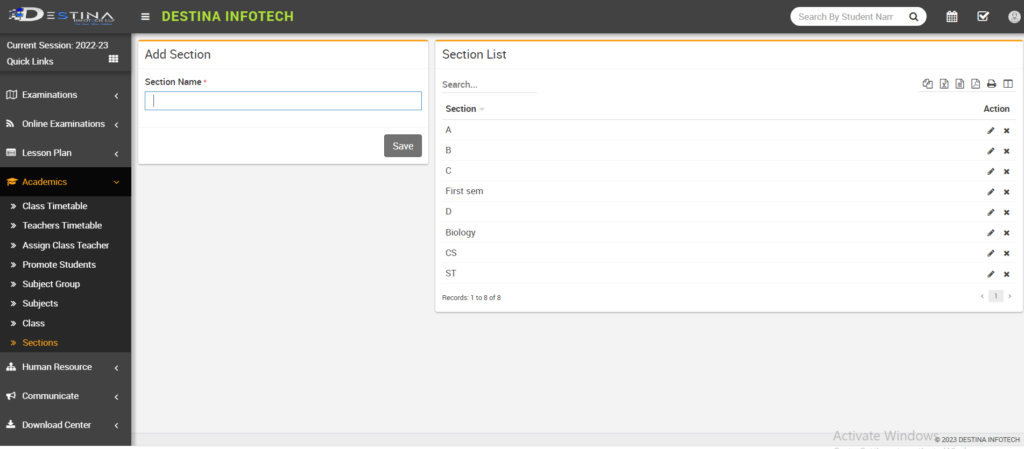
Add sections based on the academics at your institute (i.e A, B, C, Red, Blue, Mahatma Gandhi, Mother Theresa, First SEM, Biology, CS etc.) A, B, and C are the typical school parts, therefore if there are fewer kids, add extra sections because you cannot assign later. In colleges, sections are available both semester-by-semester and per elective subject (Biology, Statistics, CS etc.)
Class
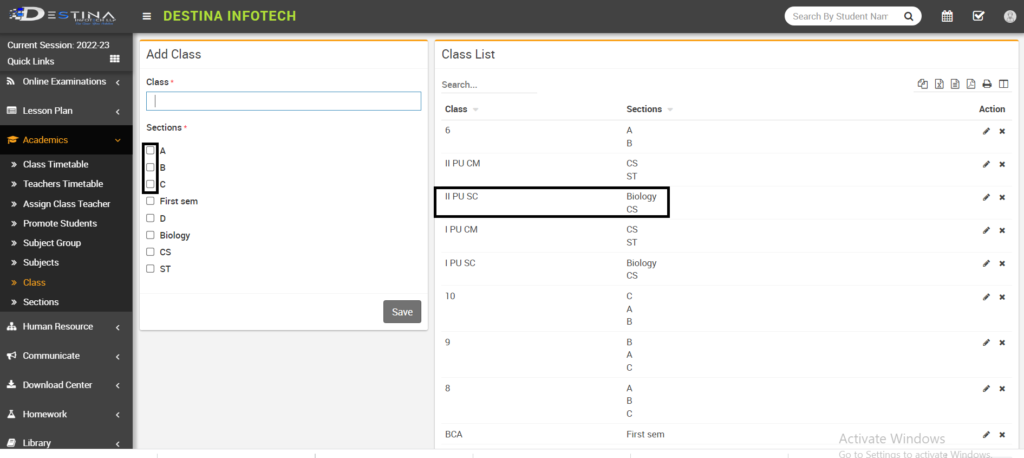
Add courses (i.e. 1, 2, 3, 4, I PU SC, II PU COM, BCA, BBA, BA, etc.), check the boxes next to the parts that apply to that Classes, and then click Save. Classes containing parts will therefore be visible as a result (marked).
Subjects

Including subjects (i.e. Kannada, English, Mathematics, Science, PE, Drawing, Physics, Coding, Physics Practical, 77 Chemistry etc.) If you want to add Practical subjects, you must click on Practical. Together with Subject name, you can also enter Subject code. Then, each time you want to store the records, click the Save button.
Subject Group
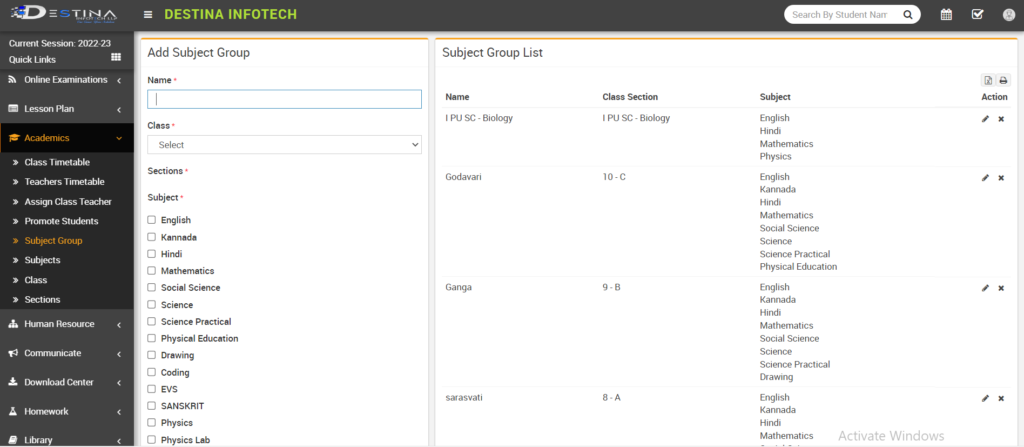
Once on the subject group page, enter the subject group’s name first (e.g., I-A, II, III, I PU SC- Bio, II PU COM-CS, BCA first SEM etc.) Choose the class for which you are creating the subject group after adding the group name. If you’ve already added classes, those classes will appear in the dropdown list when choosing the appropriate class. Then tick the boxes next to any academic courses you’re including in that class’s subject group. To create a subject group, click Save. If you accidentally inserted something, go to edit and make the necessary changes. Making subject groups is crucial for creating the class schedule.
Promote Students
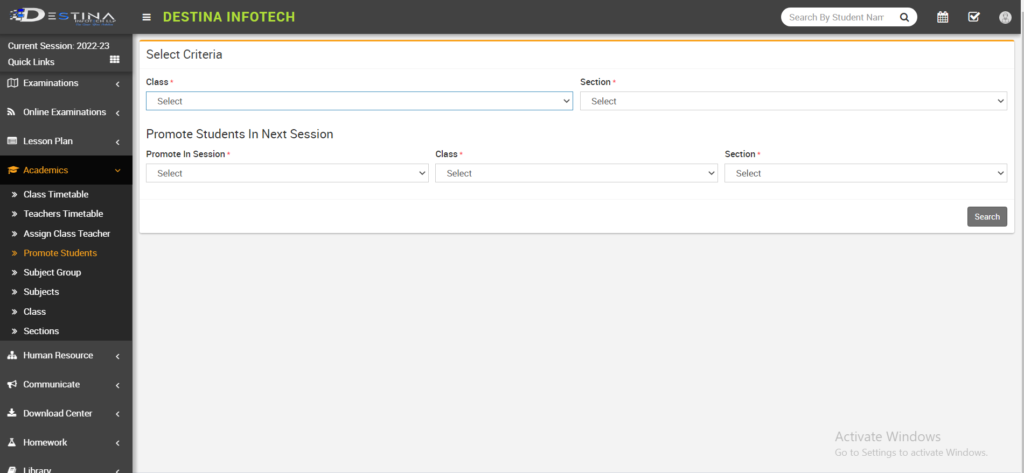
After the academic year is over, you must recommend students for the following class. Choose the class and section of the students you want to promote after signing in to the Promote Students page. Then click on search to retrieve the list of students. Then click on Promote in session and enter the next academic session. Next, click on Class and Section and input the class and section they are promoting. The following section will discuss promotion strategies.
Promoting students
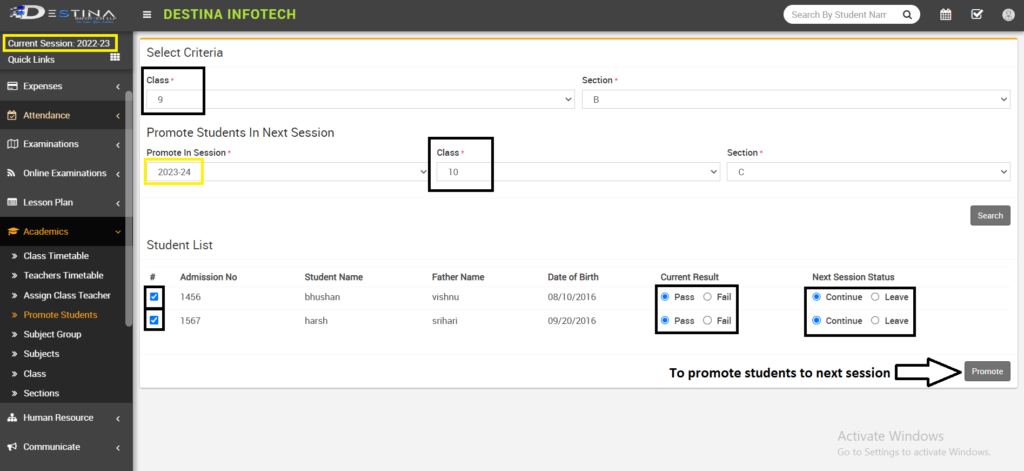
Students from the 2022–2023 (marked) session’s 9th B section are being promoted to the 10th C section for the upcoming academic year 2023–2024. (marked). After pressing “search,” a list of students will be retrieved. You must now mark the current result as pass or fail. Mark continue if they’re moving forward. Mark leave if they are discontinuing. Next, select Promote.
NOTE : You’ve to promote higher class students first. After promoting higher class students top class will be empty for next Academic session then promote students in decreasing order.(e.g. promote 10th class students first, then 10th class will remain unfilled. Then promote 9th class students to 10th class, likewise).
Assign Class Teacher
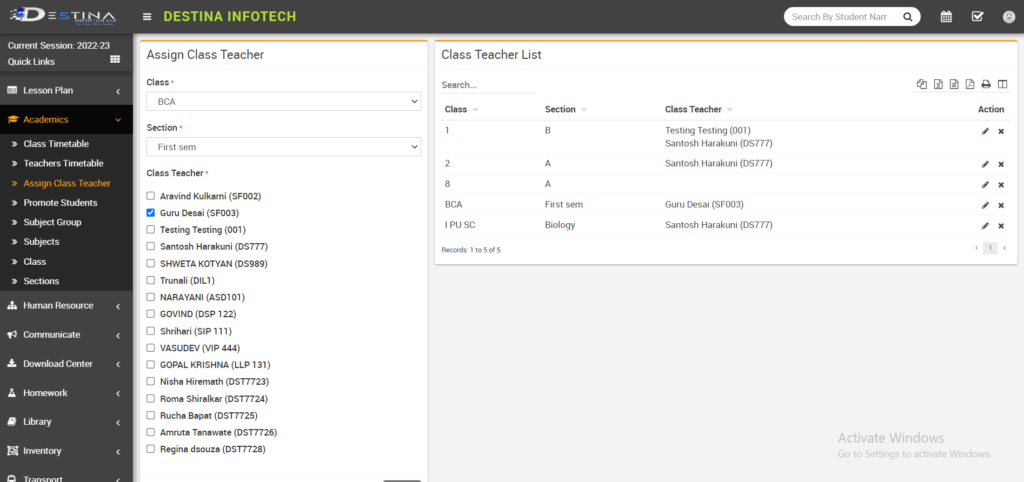
Choose the class and section first, then mark the teacher’s name and save to assign the teacher. Guru Desai (SF003) will be the class teacher for BCA’s first semester under this situation. The class teacher will be assigned after saving the record. Click on edit, make your changes, then save the record if you wish to switch the class teacher.
Class Timetable
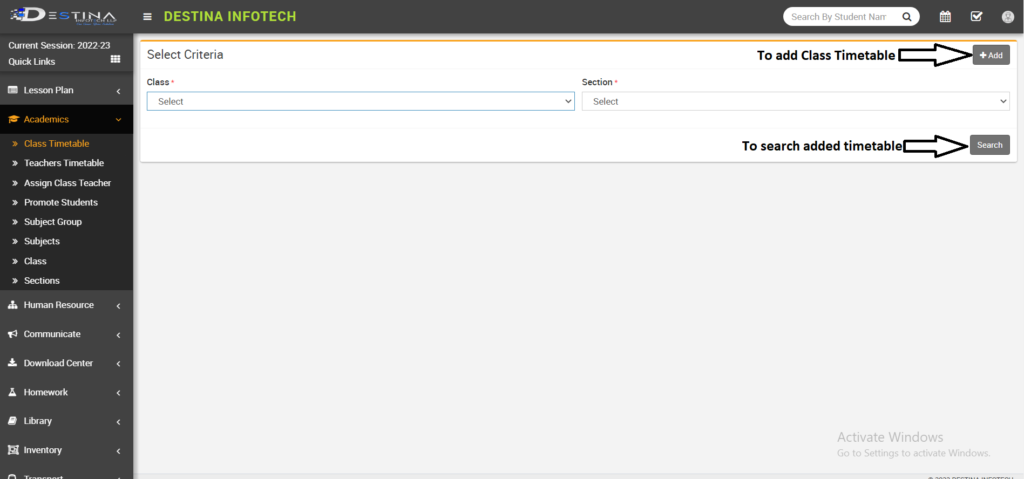
To add a class schedule, select +Add (marked). It will reroute to a new page to establish a schedule that will be discussed in the following section. Choose a class and a section to display a previously prepared class schedule. You will be redirected to a new page containing the class schedule.
Add Class Timetable
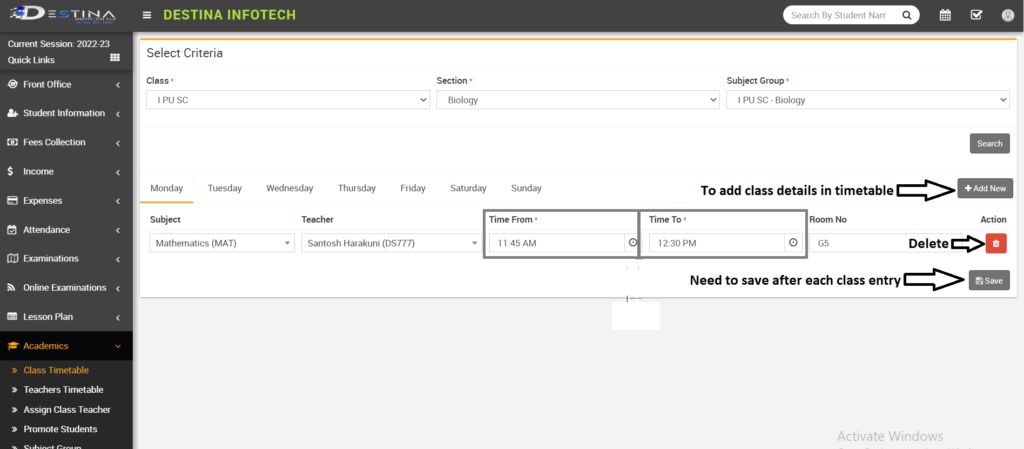
For the I PU SC class Biology portion of the I PU SC-Biology subject group, we are including the class schedule below. In order to create a period-by-period class schedule, choose the class, section, and subject group, then click on search. Next select the day, either Monday or Tuesday, and the time, subject, and teacher from the dropdown menus by clicking +Add New (marked). Next, include period time. Time from and Time to refer to the beginning and end of a period, respectively. You can manually add timings or look them up in the clock. Then include Room no. and select “save” (marked). After each period entry, you must save. Likewise, include a weekday class schedule broken down by period. Use delete to remove any record if you want to (marked).
Teachers’ timetable information will automatically be fetched after you add a class schedule.
Student Information
Disable Reason
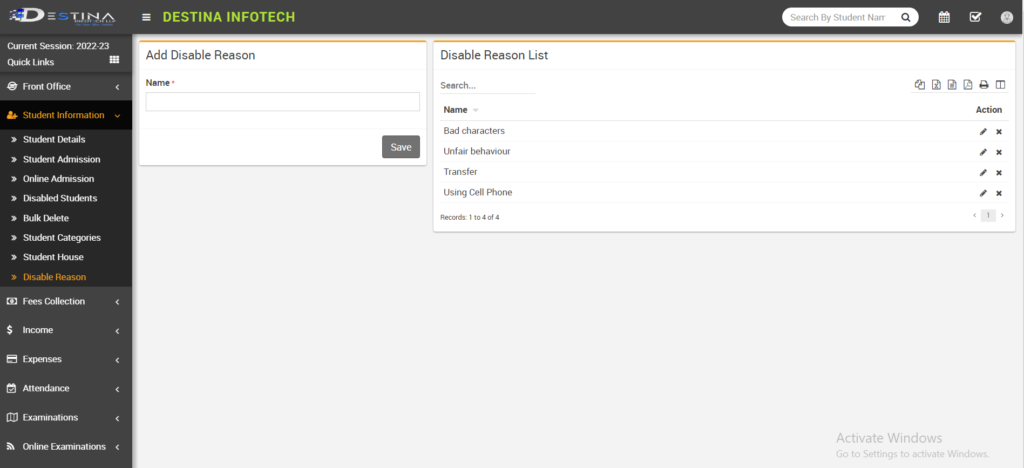
Add Disable Reasons here if you want to disable a student. (For instance, Transfer, Bad Individuals, using a Mobile Phone, etc.) then select save to add justifications. When putting a student on probation, you must give a cause. The following segments will discuss how to disable students.
Student House

To add your institute’s student house, click Student House. Add the name of a house (such as Blue, Red, Malaprabha, Mahatma Gandhi, etc.), then hit “Save” to preserve the records.
Student Category
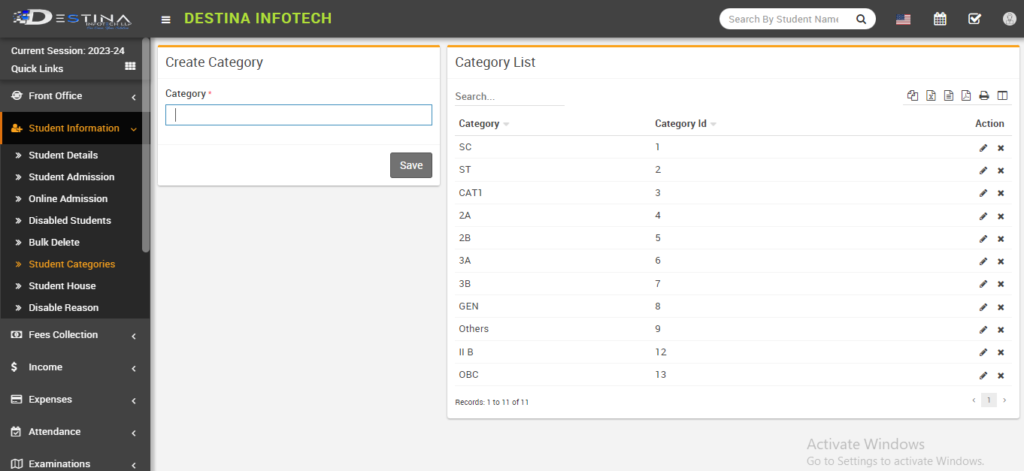
To create a category, click Student categories. To preserve the record, enter the category name (such as SC, ST, 2A, 2B, etc.) and click Save.
Student Admission

Visit the student admission section and fill out the form to admit students. Mandatory fields are Admission No., class, section, first name, gender, and date of birth (highlighted). Students won’t be able to sign up on the page without these additions. Add the appropriate fields, click +Add Sibling if the kid has siblings, fill out the necessary information, and the parent’s information will be fetched immediately. Next, click Save to save the information. Share the student Excel sheet if you wish to add many students at once. Our professionals will then set it accordingly and help you add every student at once.
Student Admission (Parent details)
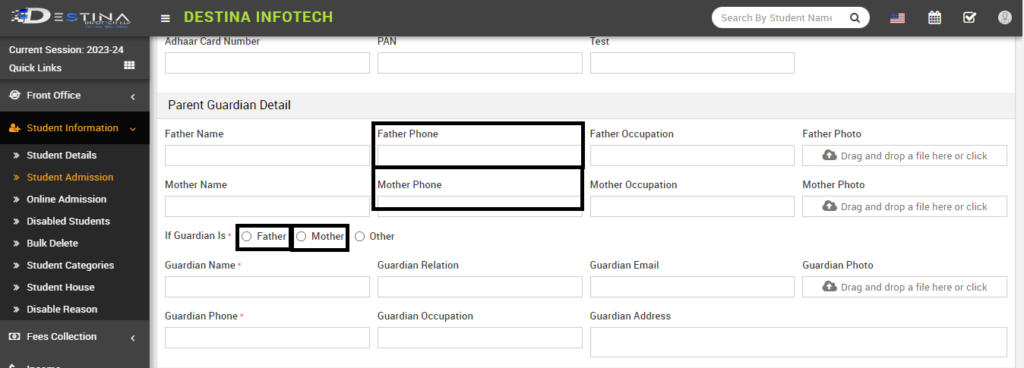
Provide any parent or guardian details here. Specify the parents. Choose either a mother or a father or other from the drop-down menu to serve as the student’s guardian. Provide a functioning phone number to receive business automated messages concerning admission, attendance, reminders of fees, and progress.
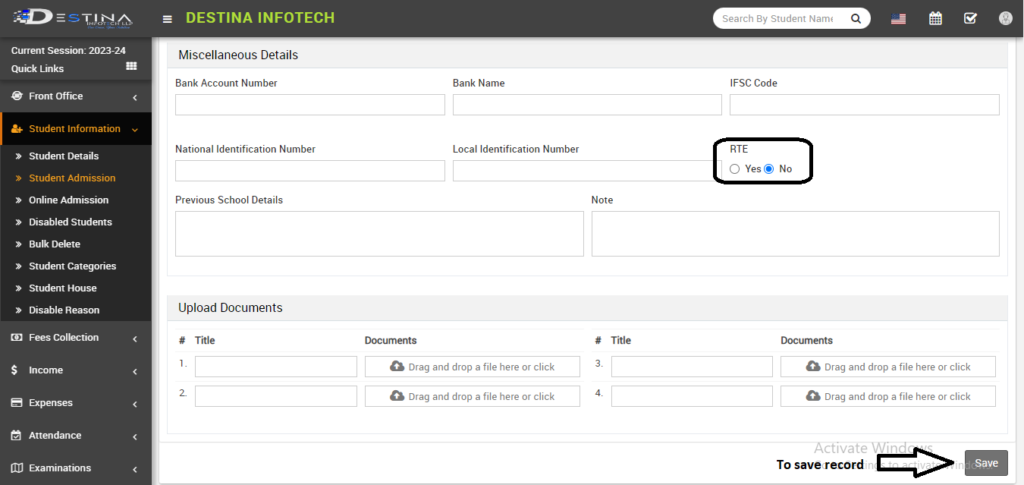
Use this page to add Miscellaneous Information. If the student is eligible for RTE (Right to Education), check the box to waive costs. Append previous school information for the admissions campaign. You can add Student TC, an Aadhaar card, a birth certificate, or any other document for admin reference under the upload document area. Then press “Save” to keep the records.
Online Admission
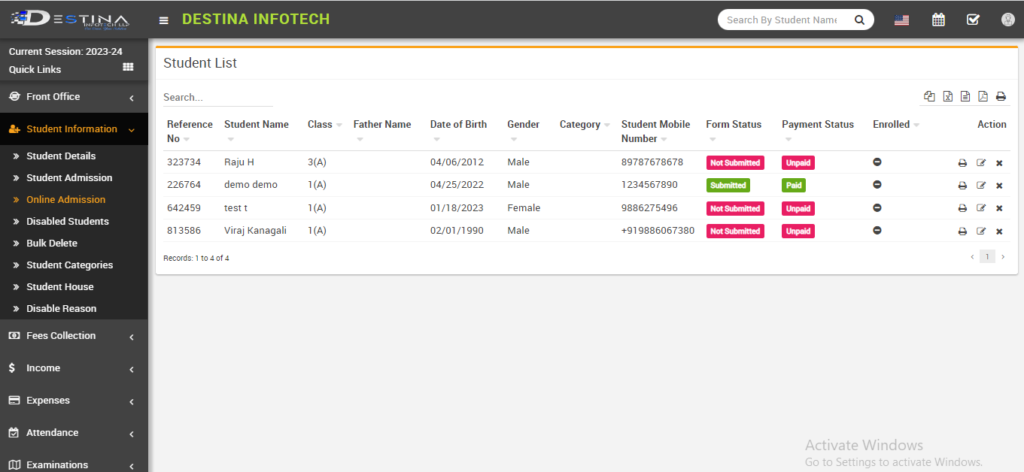
If parents are not accessible for admission after generating an online admission link and sharing it with them, they can fill out their admission form online. Upon the parent’s response, it will be instantly retrieved. We can set up a payment gateway for online transactions if the school can provide bank account information.
Student Information
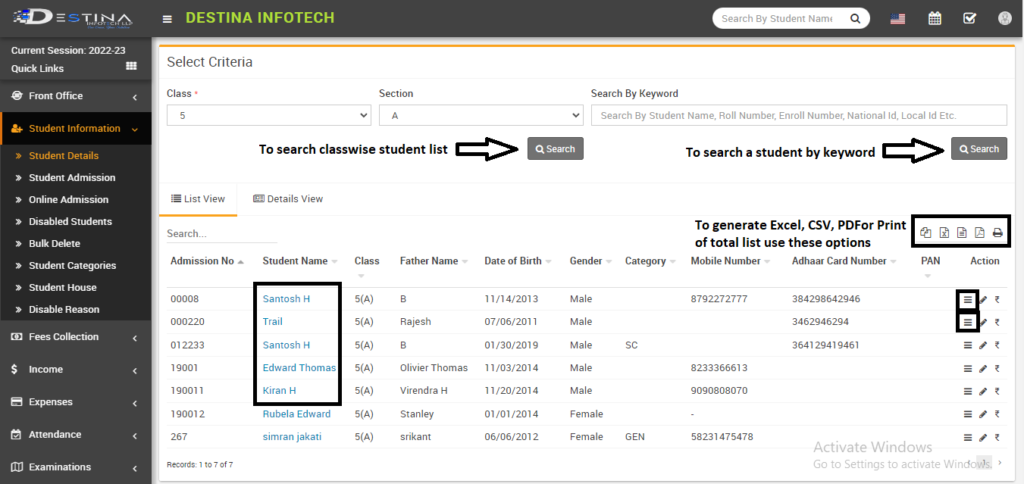
If you want to retrieve a classwise list from student details, choose the class and section options. Choose the second search box if you want to search for students using specific terms (student name, roll number, enrollment number, etc.). We are now gathering the 5th students from section A. There are two different sorts of views: list views, which provide a list of students, and detailed views, which produce a list of students’ details. You can access the student profile by clicking the student name (highlighted) or the show option (highlighted). Use the highlighted options to create an Excel, CSV, PDF files or print the list of students.
Student Profile
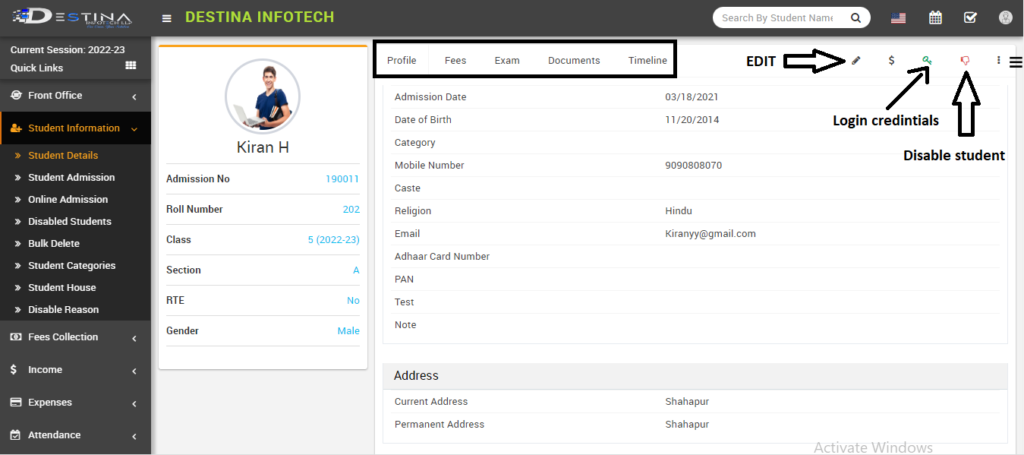
The student name link in the student details will direct you to this page. Use the edit option to alter any information you wish to, then save your work to keep the changes. Use the thumbs down (highlighted) button with the appropriate disable reason if you want to disable a student. Students who become disabled will no longer appear on the school students directory. Search under the disabled students option if you wish to look for disabled students. Upload additional student documents using the document section.
The student profile will be redirected after the fees and exam schedule have been assigned.
