Fees Collection
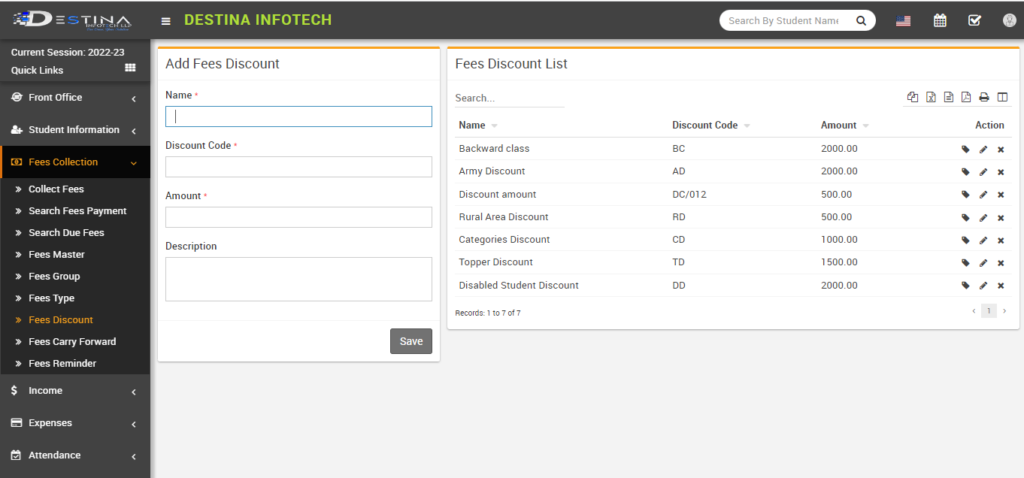
Add the fee discount first, then enter the fee type. Once you’ve reached the page for discounts on fee, you should enter any discounts you may have, in accordance with your institute’s accounting policies. If you don’t have a discounting policy, keep things as they are. Mention any discounts you may have, in accordance with your institute’s accounting policy on discounts, if you have any (for example, the Army discount, the Topper discount, the Rural area discount, etc.). For your reference, provide a discount code (such as AD, TD, RAD, etc.) (for mentioned discount types above). Although you are free to provide any discount code, the page will not let you finish the process without it. To keep the records, enter the appropriate discount amount and click “Save.”
Fees Type
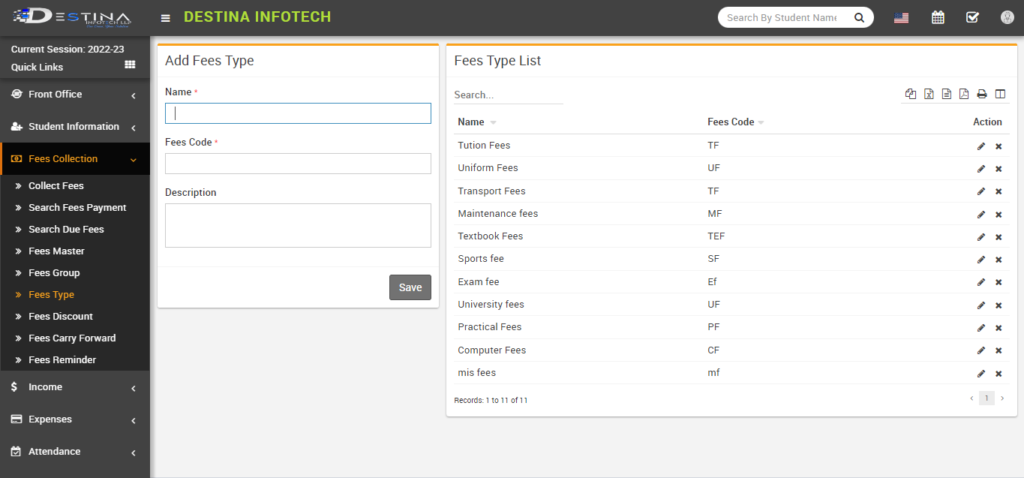
Navigate to the fees type option to add a fee’s type. You are allowed to create as many fees heads as specified on your fees receipt here. Add-on fee categories/heads (For example, Tuition fees, Exam fees, transport fees, sports fees etc.) Enter the appropriate fee code, and if you have any notes, put them in the description. Then click Save to save the records.
Fees Group
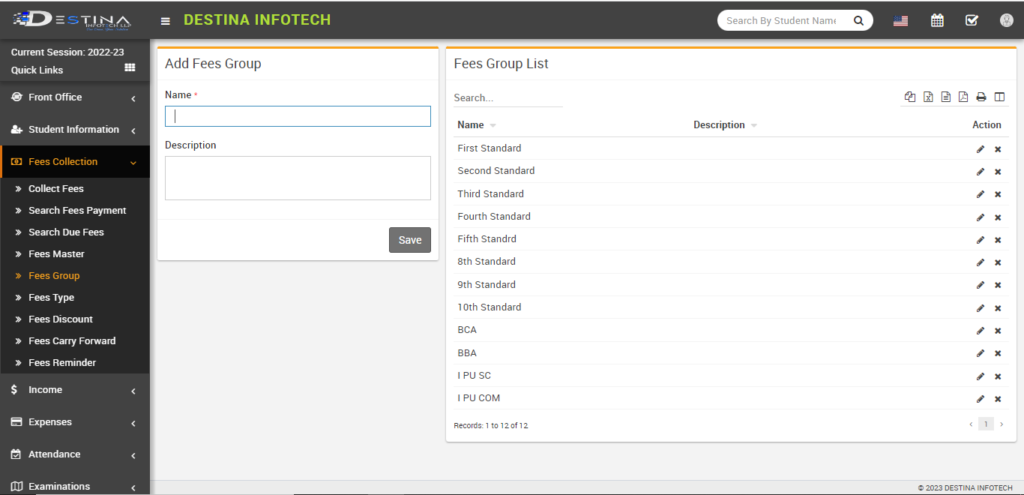
Various fees groups are applicable to various classes. Thus, adjust group fees as necessary. If the fee structure is the same throughout multiple classes, then the same fee group should be mentioned. (For example, if the primary section has the same fee structure, the primary section fee group should be assigned to all primary classes). If different classes have different fee structures, name the group for class fees and assign it to the appropriate classes (for example, first standard, fifth standard, tenth standard, BCA I SEM, BBA III SEM, PU I SC, etc.). Then click Save to store the entries. The following portion is concerned with allocating fees to groups of students.
Fees Master
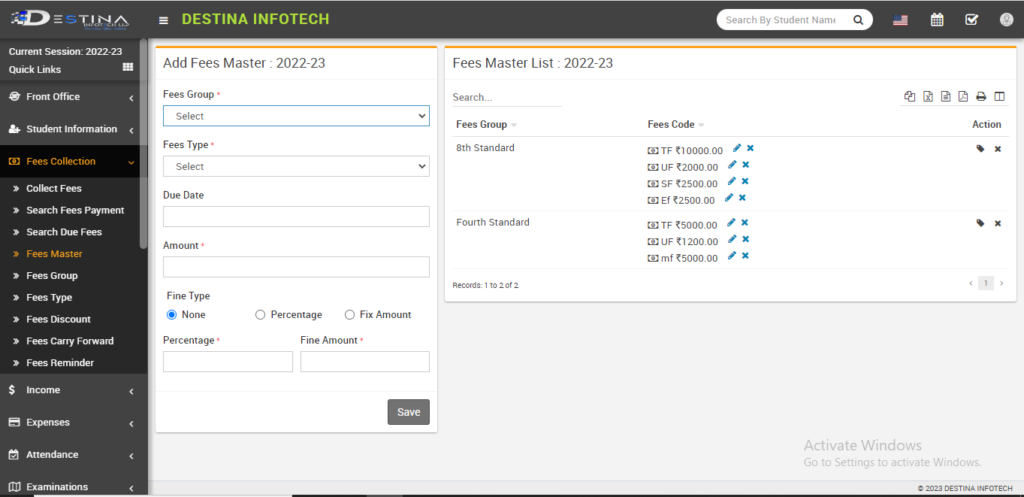
When you choose the fees master option, you will arrive at this page. Assigning fees to students is a key step. Only you may then collect fees here. Choose the fees master option after creating the fees group and fees type. In order to collect fees, first choose the fees group and types from the dropdown. You cannot process the page without adding a due date. Also, parents must get texts with reminders about payments. Then enter the appropriate amount, keep fine type as none, and click save to save the entries.
Creating Fees Master

Out of the fee group dropdown, we have selected the Fifth standard in this example. The drop-down menu for fees type has been expanded to include tuition, MIS, uniform, and transportation fees. Inserted June 30 as the due date here. The following fees have been added: Rs. 5000 for tuition, Rs. 5000 for MIS, Rs. 2000 for uniforms, and Rs. 2500 for transportation. We have already created a fees master for fifth-grade students; click the option marked with a check mark to assign it to them. We’ll explain about assigning in the following section.
Assigning Fees to students
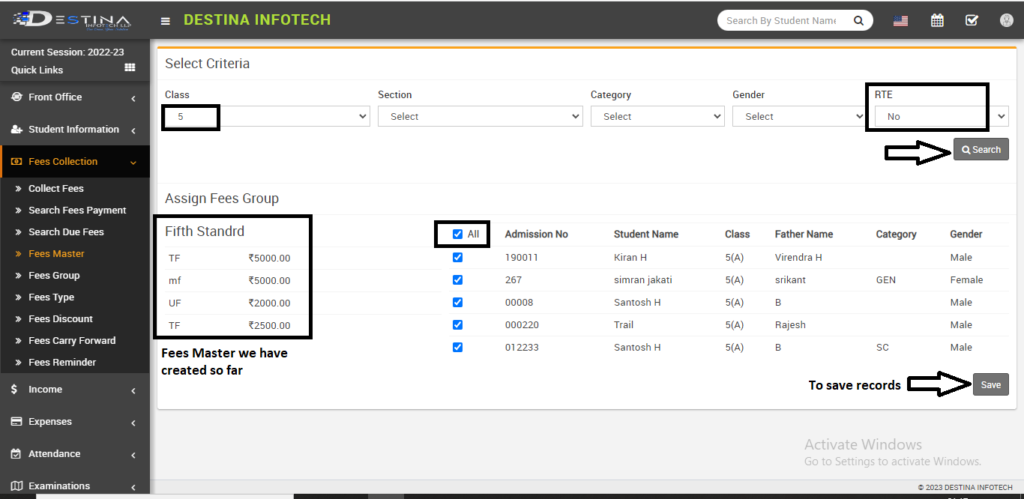
You will be taken to this page after selecting the option to Assign to Students. Recently, we established the Fifth standard fees group. Therefore, we must assign it to students in the Fifth Standard. Therefore, choose Class 5 in class. If various sections have different fees, then choose the section accordingly. If all sections have the same fees, leave things as it is. Next, choose No under RTE (RTE students are not charged fees). After choosing the highlighted All option, click store Records to store the records.
Collect Fees
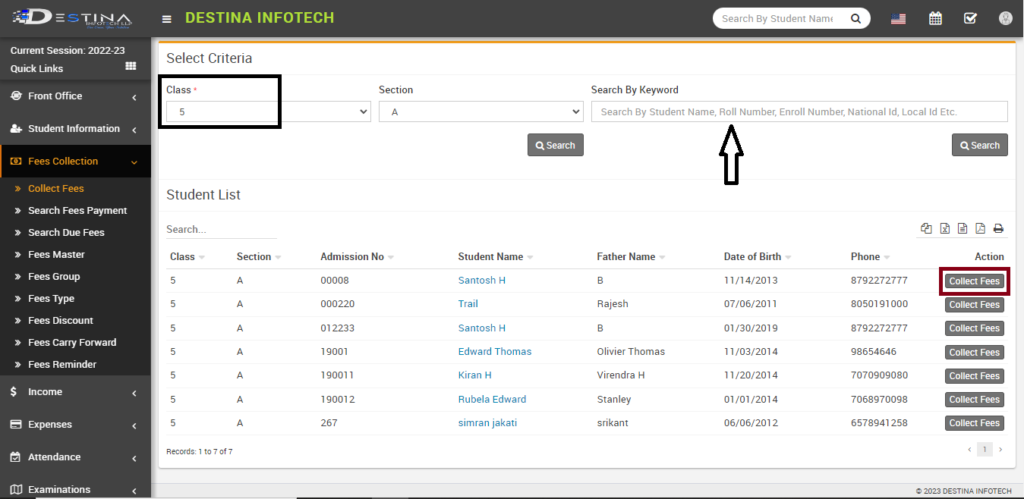
Use this option to collect fees after assigning the students their respective fees. To receive a list of students, select the class and section from the dropdown menu and perform a search. Use the alternative search box to look up a particular student by name or any other key word. We have already assigned the fifth student’s fees, thereby let’s collect the fees for that class. To collect fees, use the highlighted collect fees button. In the following section, we’ll discuss how to collect fees.
Collecting Fees
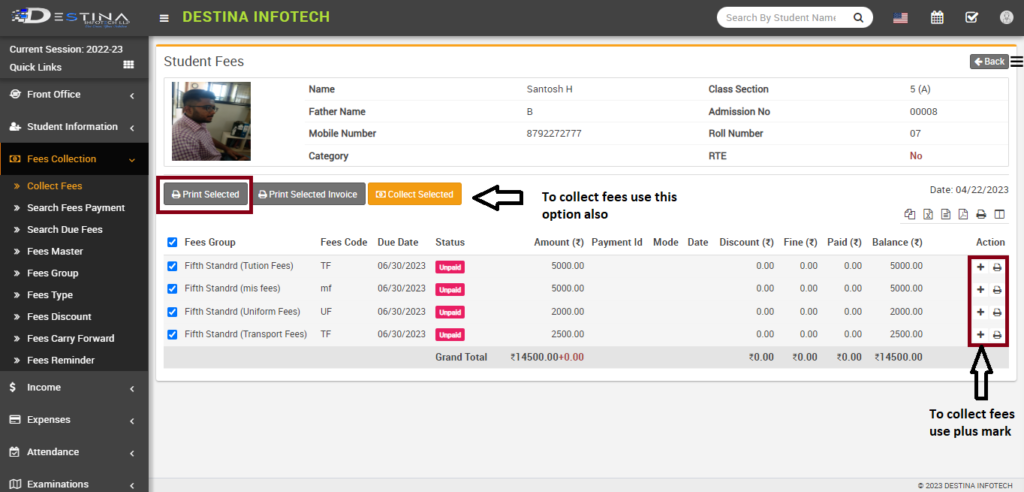
You’ll be taken to this page after selecting Collect Fees. In order to collect student fees, click the “+” sign. If they are paying all fees at once, choose the group for the entire fee and choose the way to collect selected. Choose all fees group and click print selected if you only want to take a printout. There will be four copies made. (office copy, school copy, student copy and bank copy). The following segments will discuss how to collect fees.


0 Comments